Settings - Configure Port
Configure port.
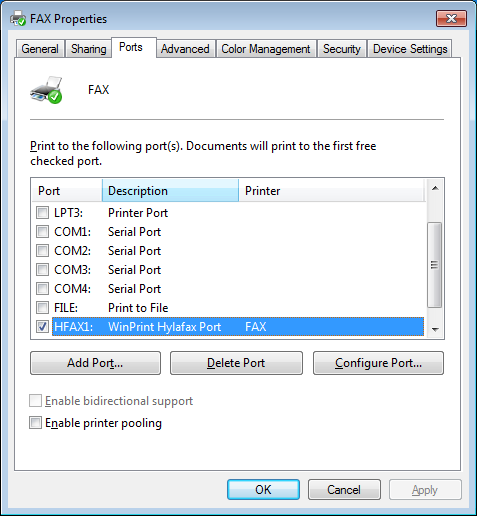
Right-click on the printer (FAX) to call up its properties, and select the "Ports" tab. Locate the port you just created (HFAX1:) and click "Configure Port".
Settings are the same as the WinPrint HylaFax:
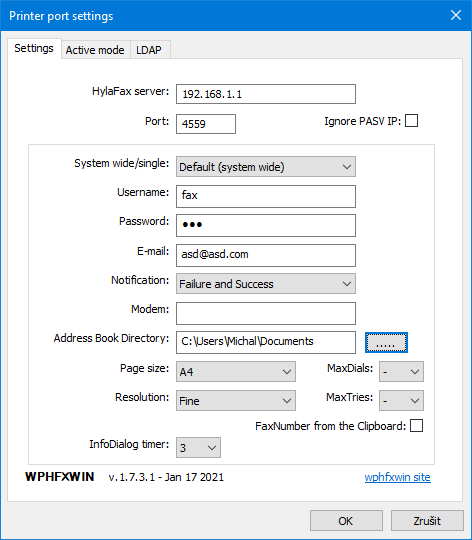
Tab - Settings
- HylaFax server - IP address or a name of the HylaFax Server.
- The combobox below: "Default" = system wide settings. "User name" = individual settings. A subset of the settings can also be modified by users. For non admin users - you can call up the user settings dialog by menu item in the SendFAX dialog too (Send FAX).
- Port - Hylafax Server port - default 4559.
- Enter your Username and Password of the HylaFax Server
- Email - enter an email for notification about your FAX job and select the Notification type
- Modem - configured modem groups. Look at the documentation of the HylaFax about ModemGroup:
- Address Book Directory - directory where the program will create the file „addrbook.csv“ and where will be stored address book data (name and number). To create an item - right click above the Address Book pane on the Send FAX dialog and choose from the menu.
- Page size - page size (mostly A4)
- Resolution - FAX resolution. Default is Fine.
- MaxDials - max phone calls to make to transmit a job. If the value "-" is selected then "MaxDials" is not used by client.
- MaxTries -
max attempts to transmit a job. If the value "-" is selected then "MaxTries" is not used by client.
- Ignore PASV IP - for special purposes (default uncheck). Ignore passive = ignore IP gets from the server.
- FaxNumber from the Clipboard - Fax Number is entered automatically from the Clipboard when the "Fax Send" window is displayed